How to Take A Screenshot in Selenium WebDriver
Introduction
The concept of taking a screenshot in Selenium is very much useful and important as well. This conveniently works when testing fails and it is tough to re-set the entire script once again from the beginning. The screenshot becomes helpful here as they identify the test failures immediately. IN this article, we will learn how to take a screenshot in Selenium.
Why is it Necessary to Take a Screenshot in Automation Testing?
In the process of bug analysis during automation testing, screenshots come in as a survivor. However, Selenium itself takes screenshots while execution. If you are doing an automation testing of a web page and you write a script for the same, you have to monitor the script frequently in order to check if that is working or not. Rather you would wish to allow the script to work accordingly. Below are the advantages of the screenshot in Selenium:
- They help you understand the application flow and its behavior.
- It helps in performing cross-browser testing. Here, as you know, the user will wish to see the execution reports on timely bases.
- You must categorize the WebDriver test case to TakesScreenshot.
- Execution tracking becomes easy.
- If there are any failed tests, you can still easily capture the screenshot.
Capturing Screenshot in Selenium
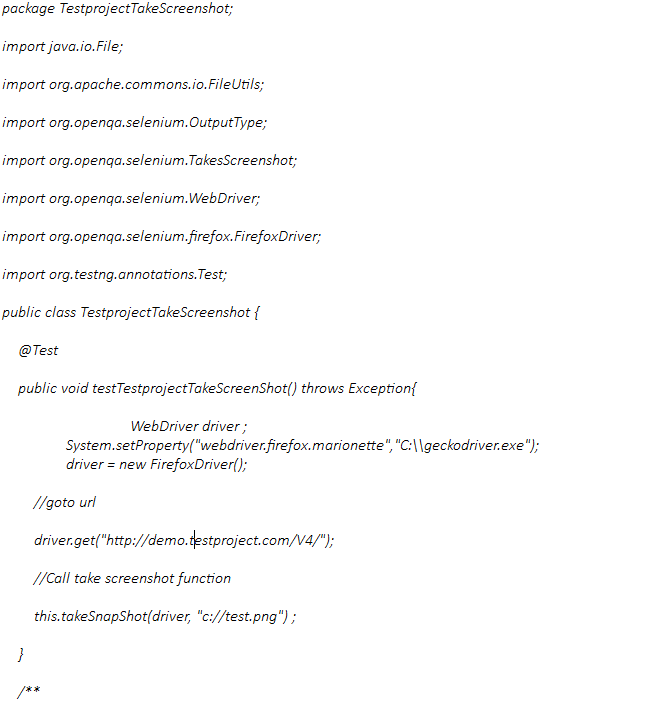
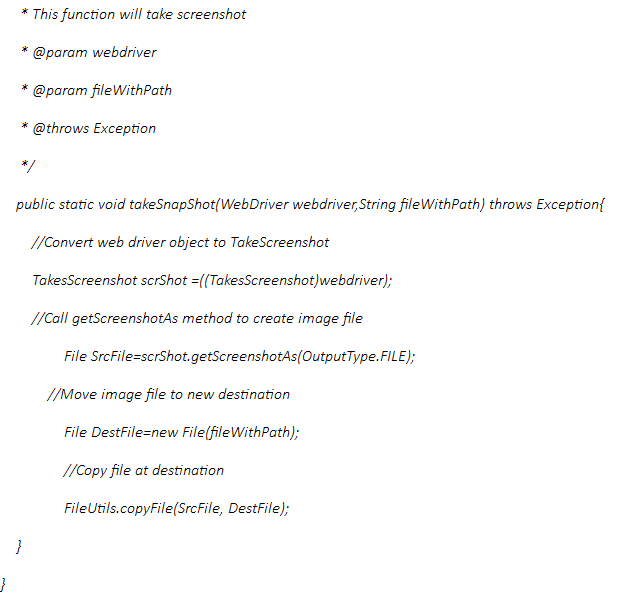
In order to take a screenshot, you must use an interface TakesScreenshot in Selenium. It directs the driver to capture a screenshot and save it in various ways. The following are the steps to be followed. Each step will have the script for your easy reference:
Step 1: Change your web driver to TakesScreenshot.
TakeScreenshot scrShot=((TakeScreenshot )webdriver);
Step 2: Use getScreenshotAs process to generate an image file.
File srcFile=scrShot.getScreenshotAs(OutputType.FILE)
Step 3: Now, you must copy the file the location of your choice. The below image shows the screenshot of a test project. We will execute the script to capture a screenshot and save it in our desired location.


Here, you must note that version 3.9.0 of Selenium or versions above than this do not offer Apache Commons IO JAR. Simply download it from Apache Commons’ official website and then use it while taking a screenshot.
What to Do When a Test Case Is Failed?
There are some abundant features in Selenium WebDriver. It makes the application testing an easy task. Since the WebDriver Architecture enables interaction even outside Javascript sandbox. You can also capture a screenshot from WebDrive.
Screenshot can be taken at any stage but it is more helpful when there is a failed test case. It helps you to backtrack the activities and analyze the reason behind test failure. It is done through TestNG annotations. Here are the steps you need to follow.
- Implement TestNG ‘ITestListener‘ by creating a class
- Call method on test failure’
- Now, add a code in order to take a screenshot
- Before taking a screenshot, name the test method and capture the screenshot along with its name and store it in the destination folder.
You must have a driver object to take a screenshot. Let’s understand how to use TestNG and get driver object in TestListeners class. Move the driver object from ITestContext and set it as base setup. Here it becomes easy for the user to create driver instance.

